The holiday season is upon us, and deciding what to give your family and friends can be one of the most difficult decisions there is. You have a limited budget; you’re not sure where to get the gifts, the wrapping has you going bullocks, there are tons of stressful factors. The good thing is we’ve you covered with these tips that’ll make gift-giving easier and make your presents stand out!
An expensive price tag doesn’t always mean your gift will have more worth, and people are bound to love it. Instead of getting something just for the sake of status and brand, think for what the person will actually like. A classic hardcover book will always be better than jewelry for the right person. For someone who cares for the planet, eco-friendly gift ideas can blow their minds because few consider that. Think about the person’s interests rather than impressing the crowd. Sometimes even the cheapest gifts have more sentimental value than, say, a diamond ring!
Wrapping the gift properly is as critical a task as buying one. A beautifully wrapped-up gift shows that you really put in the effort. If you don’t have the time to buy wrapping papers for each gift, eco-friendly gift wrapping ideas work too! Another tip is to write a little note with the gift. It’s not that hard, but these small efforts make a huge difference because, in the end, it’s the little things that count. You’re adding a personalized touch and an opportunity to connect with the person.
It's easy to mistake a gift for a bribe in the business world and vice versa. Therefore, you should exercise caution while giving gifts to business connections. Your presents can be misconstrued, especially when something important, such as a contract, is at stake.
You’ve gifted everything in the world to your significant other, family member, or friend, through the years. What’s left? Birthstones are another great option if you’re trying to personalize a gift and get something out-of-the-box. With the many benefits of wearing your birthstones, such as unique properties and healing abilities, the recipient will surely love having one of their own.
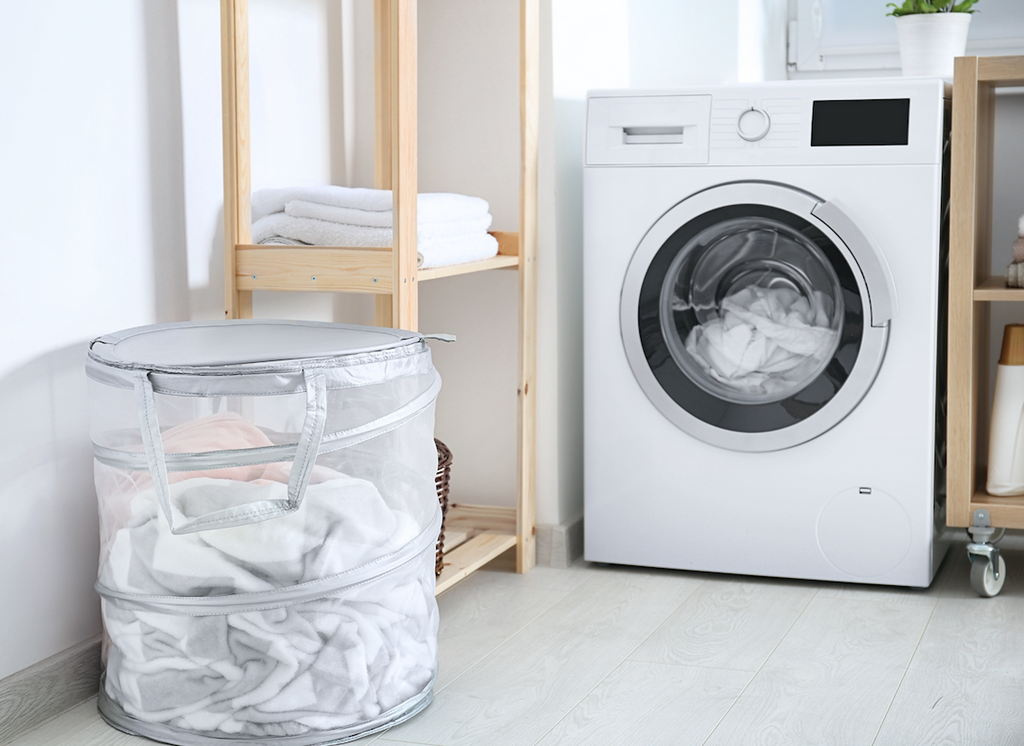
Observation is the first rule of meaningful gift-giving. Individuals who have perfected the art pay attention to what their friends and loved ones say and their interests. People are often dropping hints about their likes and dislikes, and they do it at the most unexpected times! Would they like something functional or something decorative? Is it something for the house or something for them? Thoughtful gift-givers are also aware of their receivers' situations. People don't usually ask for what they want or even realize they need it. Maybe your friend needs a new cleaning kit, or they’re out of their favorite coffee beans. By focusing on what would truly make a difference in your recipient’s life, you can give them the best gift.
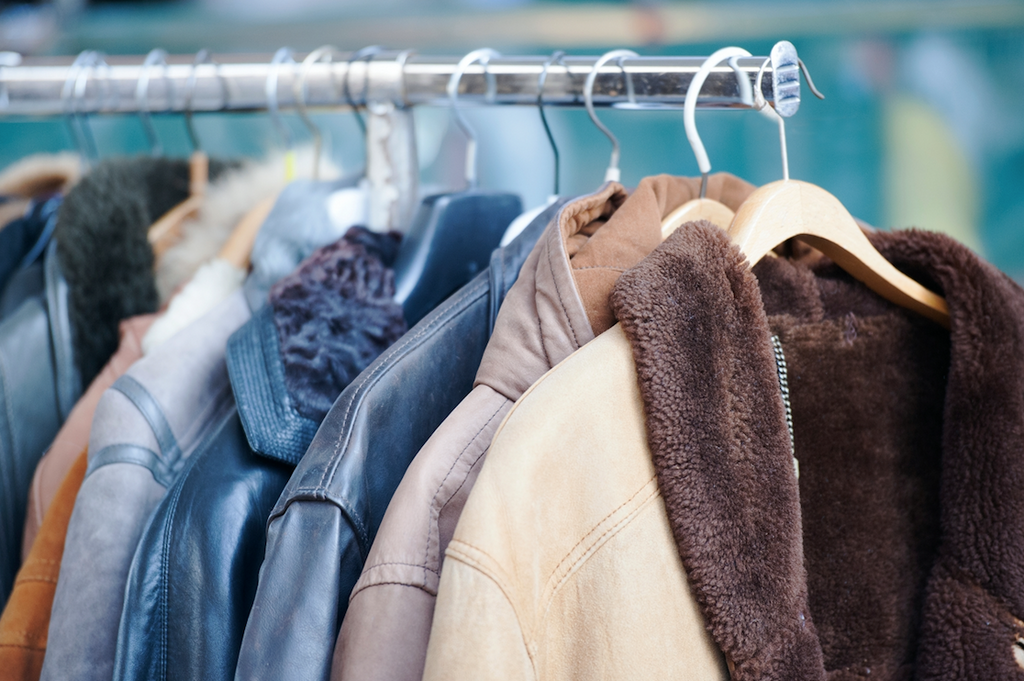
Materialistic things have their own value, but sometimes you can give your loved ones’ experiences rather than things. Take them to a new place, a little trip, a concert by their favorite artist, or on activities such as skydiving. The memories and the emotional attachment are far greater than to a physical object when it comes to experiences. They might remember that a friend or a relative brought them a new phone or tablet but not as much as attending a concert with your friend and dancing the night away.
You will not do a friend any favors by giving them an expensive and lavish gift when they are out of work or have a lesser income, no matter how well-intentioned you are. In fact, if they refuse your gift, you may merely embarrass them (and yourself). According to proper gift-giving etiquette, your gift should be acceptable for both the event and the receiver.
]]>
Every holiday season, US homes generate 25% more garbage than at any other time of year. The materials utilized for gift wrapping account for a sizable portion of this staggering total. The gleaming and sparkling wrapping paper, ribbons, and plastic bows cannot be recycled and hence wind up in landfills. The main issue is purchasing an excessive number of these non-recyclable wrapping materials and decorations and then discarding them once the presents have been unpacked. Following are a few ideas for eco-friendly gift wrapping.
A Japanese wrapping fabric that was historically used to transport possessions but has become a famous eco-friendly gift wrapping method in other cultures. All you need to wrap a gift in furoshiki is a two-sided square fabric and some basic folding techniques. Several different furoshiki gift wrapping alternatives cover a wide range of present types and styles. Use a piece of material you already own to get the most out of it—look for overlooked cloth pieces in your wardrobe or scarf drawer.
The majority of wrapping paper cannot be recycled. If shiny, laminated paper, or anything glossy, sparkly, or metallic-looking is mixed with recyclable paper, it contaminates the entire batch. This is where kraft paper comes in, as it’s biodegradable AND recyclable. When decorating a present wrapped in kraft paper, let your imagination run wild. Decorate the gifts with natural items such as pine cones, dried herbs, or dried orange slices to complement the rustic aesthetic of the paper.
While more individuals are shifting away from printed newspapers and toward digital news, 28.6 million copies of newspapers are being printed daily, and many of us have piles of newspapers at home that need to be used or recycled. There are several ways to turn this simple and basic concept into something profound. It’s one of the many household items you can use in extraordinary ways! Go through your stack of newspapers, for example, and hunt for a fascinating or humorous piece that compliments the present you're giving. Alternatively, pick an unsolved crossword puzzle and use it to create your holiday wishes.
Another lovely present wrapping - rummage through your shelves for a glass jar that can be reused. If you don't have any jars on hand, keep jars from pickled foods the next time you eat them. Again, simply ask around—your relatives and friends will almost certainly have some extra jars that you can utilize.
Decorate the jar with cinnamon sticks, candy canes, eucalyptus leaves, or carved wooden decors to add a personal touch. If you have any leftover furoshiki wrapping material, use it to cover the top of the jar and tie it up with twine.
It's simpler than you think to find eco-friendly gift bags. To begin, use a multi-purpose bag as a gift bag. People appreciate receiving a present in an eco-friendly tote. Create a personalized tote bag, and the recipient will use it for years. If you enjoy crafts, you may make reusable and eco-friendly fabric gift bags on your own. Look through your closet for pillowcases, scarves, and sweaters you no longer use, and anything else that can be reused but doesn't appear to be worn out or washed out. For example, for wine bottles, the sleeves of a sweater make a great gift bag.
What binds your packing together is an obvious source of waste: single-use plastic Scotch tape. Consider using biodegradable paper tape or washi tape for eco-friendly gift wrapping. These biodegradable substitutes are created from wood fibers, pulp, or bark, as well as natural adhesives. They come in various designs and colors, including plain brown, and you can even get colorful rolls covered with environmentally friendly glitter.
]]>
Struggling with maintaining a clean and tidy home with back-to-back gatherings in the holidays? We’ve all been there. Keeping up with house cleaning during the hectic holiday season can be difficult at times. Nobody likes to clean when there are so many other exciting things to do! In the hopes of saving you some time and energy throughout the holiday season, these tips can help you out:
Nothing is worse than running out of cleaning products just before a holiday function, so make sure to stock up on everything before the holiday madness begins. Plan ahead of time and get enough goods to last you until January. To save money and plastic, try to buy in bulk and divide the product into smaller glass spray bottles to use in different areas. Just remember to mark them to avoid mixing up the products.
Establish a timeframe each day when the entire family tidies and cleans the house. It's surprising what you can get done in a good 20-30 minutes when everyone pitches in! Assign specific responsibilities to each family member that you know they can perform successfully. Try to do it in a consistent time frame every day to make it more of a habit. Remind everyone that the more they help out, the more time you'll have to spend together enjoying all of the holiday activities. Even your kids can help out in this process with age-appropriate chores.
Getting the heavy traffic areas clean regularly will greatly reduce the spread of dirt and dust throughout the house. Ensure you have a designated shoe storage spot at the entryway to your home to remind everyone to remove their shoes and store all of the shoe debris in one place. Small area rugs at entrances can also help catch intruding dirt. If your guests are bringing in pets, place an old towel by the door so that you can easily wipe their paws when they are about to enter.
Cleaning as you go is always better than going back and dealing with a massive mess later. Make it a practice to put away little objects such as your coat or drinking glasses as soon as you are through with them. And, encourage the rest of your family to do the same! Make a real effort to do all of the minor things that only take one or two minutes, and you'll end up saving a lot of time and energy.
If you're pressed for time, and your home is disorganized, utilize a big bucket or laundry basket to store goods. Go through the home quickly, gathering everything on the floor or needs to be put somewhere else into your basket. You might not be able to put everything away before your company comes, but at least it's contained and out of view.
The restroom may be one of the busiest rooms during the holiday season, so keep it fully supplied! Keep a bathroom cleaning kit beneath the cupboards for quick clean-ups and a seasonal soap available for a festive touch. Also, make sure to get the double roll toilet paper so the rolls don't have to be changed as frequently, and put a roll or two out so that the guest can easily help himself in case the first ones run out.
Prioritize
]]>
We all want our backyards to be aesthetically pleasing and a place where you can relax and enjoy. Since the covid pandemic hit, many of us have spent our time at home. In return, this has made us realize that there is so much potential in our backyard that we never considered before because it was only a side-spot to our home. With a few simple ideas, you can decorate your backyard garden just the way you like it.
The best garden designs begin with structural pots and floral plants. Take your backyard game to the next level by placing evergreen bushes at the corners and as backdrops along the route. For larger spaces, you can mix and match small shrubs and trees. Fill up the spaces with gorgeous flowering plants after you have this frame. Limit yourself to five or six different varieties for a coordinated and harmonious look and arrange them in recurring patterns. Maintain borders at the edges, with smaller plants in front and the taller ones at the back to create a symmetrical placement.
The color, style, and layout can create a distinct design direction for the entire garden. For example, grey or white stone laid in a random pattern produces a French country style; black or silver paving organized in a regular pattern creates the perfect backdrop to a sleek and modern scheme; and golden stone arranged in a mixed pattern creates an English country vibe. Scroll through Pinterest for inspiration and recreate the look.
Choose folding furniture or bench seating that can be stowed under a dining table when not in use for smaller courtyards and patios. L-shaped sofas can be quite compact, although bigger locations can accommodate full-fledged seating sets with coordinating chairs, sofas, and tables, sun loungers and day beds, or trendy hanging egg chairs & swing seats. Whatever you do, carefully consider the furniture that goes with your backyard instead of rushing into it.
In a tiny garden, boundary walls, fences, or hedges may be the most visible piece and can ultimately bring the whole aesthetic appeal of the backyard together. You don’t have to get 55 pieces of the same object, but color or pattern coordination will definitely stand out. For instance, pair the fence and climbers on it with complementary color combinations. If you can't replace the fences, try painting them using wall paints or installing wooden frameworks.
The most important thing to remember when using garden ornaments is blending them with the scenery. Choose carefully; not every ornament will go with your backyard, and you might even end up with a visual disaster. If the ornament’s size is too small, it won’t serve the purpose of adding a visual bonus to the backyard, too big, and it’s a recipe for disaster. The latter has also been known to depreciate your property, so keep that in mind when it comes time to sell. Plus, contemporary isn’t the only option, antique ornaments can add a vintage look to your backyard.
A garden room is a terrific option to optimize and extend your space. You can use this additional room to create an office area or a yoga studio. Another plus is that homeowners usually don’t need to obtain planning approval for this space. Whether it's a huge shed or a summerhouse, it can be the ideal location for entertaining visitors throughout the year, and it can even be utilized as additional guest lodging. Consider ideas to make your garden more than just a place to eat, drink, and relax in the sun.
Living walls are becoming increasingly popular in garden design, and they are an excellent way to embrace vertical planting while also adding a dramatic element to your outdoor space. A living wall can be placed anywhere in the garden; just like a border, choose the appropriate plants for that area. There are numerous green wall kits and live wall planters available, so search around to select the best that meets your needs.
There are numerous strategies to lower your household's energy consumption, ranging from minor behavioral changes to significant housing upgrades. The two most important reasons for conserving energy are saving money on power bills and safeguarding the environment. Here are several ways through which we can conserve energy at home and play our part in a cleaner and greener environment:
Begin with modifying simple behaviors at home and ensuring that your entire family embraces eco-friendly methods while you prepare for the new year. You'll always want to switch off lights and appliances when they're not in use. Simple everyday habits such as turning off your light when you leave your room can help you save electricity. You can hand-wash your dishes instead of using a dishwasher, and you can air-dry your clothing instead of using an automatic machine dryer.
Standard incandescent light bulbs use a lot of energy and need to be replaced more frequently than energy-efficient ones. Halogen incandescent bulbs, compact fluorescent lights (CFLs), and light-emitting diode bulbs (LEDs) use 25-80% less electricity and last 3 to 25 times longer than standard bulbs. Although energy-efficient bulbs are more expensive when purchased, their efficient energy use and longer lifespan imply that they cost less in the long run.
Phantom loads, or the electricity consumed by electronics when switched off or in standby mode, are a significant source of energy waste. In fact, 75 percent of the energy used to run household gadgets is spent when they are turned off, which can cost you up to $200 each year. A similar approach is usually taken in offices, resulting in ample energy wasted. Smart power strips, also known as advanced power strips, eliminate phantom loads by turning off the electricity to electronics while they are not in use.
You can set a programmable thermostat to turn off or lessen heating and cooling when you’re asleep or off to run an errand. Installing a programmable thermostat eliminates unnecessary energy use from heating and cooling without requiring an upgrade to your HVAC system. A programmable thermostat can save you an average of $180 each year. Programmable thermostats are available in various styles that can be programmed to meet your weekly plan.
On average, appliances account for around 13% of total household energy consumption. When shopping for a new appliance, keep two numbers in mind: the initial purchase price and the annual operating cost. Although energy-efficient appliances may cost more upfront, their operational costs are typically 9-25 percent cheaper than conventional versions. When shopping for an energy-efficient appliance, seek those with the ENERGY STAR label.
Insulation helps minimize your utility expenses by holding heat in the winter and keeping heat out of your home in the summer. Where you live determines the required level of heat resistance, or "R-value," for your insulation. The recommended R-value for buildings in warmer climates is substantially lower than for buildings in colder regions such as the Northeast. The amount of insulation you need is determined by the size of your home. The five key areas you should consider adding insulation are your attic, walls, floors, basement, and crawlspace. Or, you can always go for tips to keep your rooms cozy without the need to constantly keep your heating system on.
Windows are a substantial source of energy waste, accounting for 10 to 25% of your entire heating expense. Replace single-pane windows with double-pane windows to decrease heat loss. Gas-filled windows with "low-e" coatings can greatly cut heating costs in colder climates. Furthermore, interior or exterior storm windows can cut wasteful heat loss by 10 to 20%. If your area is prone to severe weather, you should attach importance to storm windows.
Water heating accounts for a significant portion of your total energy use. Aside from acquiring an energy-efficient water heater, there are three ways to reduce your water heating expenses: utilizing less hot water, reducing your water heater's thermostat, or insulating your water heater and the first six feet of hot and cold water pipes.
You may rank upholstery as one of the last things you need to consider when giving your home a new look, but it's actually one of the essentials. You don't want to be second-guessing the upholstery fabric for a new sofa or armchair a few months after it arrives at your doorstep. Choosing the wrong material and color can ruin the look of the whole room. Also, incorrect choices could mean often finding yourself battling stains and snags. Here are some things you should consider before you start buying new upholstery for your home:
Budgeting how much you want to spend on furniture is usually the best place to start because this determines your fabric selection. Various elegant upholstery is available in opulent fabrics such as velvet, and they won’t break your bank. However, with low-priced upholstery, your color options may be limited to a few. A higher budget means you can customize the fabric, color, and design of your choice. There are hundreds of materials and colors to choose from. Plus, you can order fabric swatches before deciding to ensure you're happy with your selection.
Where you intend to place your upholstery can significantly influence your choice of fabric. If you are looking for a sofa that will go in your work-from-home area, you can opt for premium fabrics such as velvet or high-thread cotton. But, do keep in mind that such luxury fabrics require extra care and most likely a professional cleaning once in a while. On the other hand, if the furniture is to be used frequently and there are kids and pets around, the safest option would be smooth cotton fabrics as you can wash them easily. You can also use a reliable fabric stain remover for everyday use for cleaning upholstery. Durable materials such as corduroys and microfiber fibers go well for living rooms.
The color of upholstery fabric can have a significant impact in a variety of ways. New age colors put on vintage furniture give the room an urban, edgy vibe. Light colors on large upholstery in small rooms make it appear spacious. Ask yourself what kind of vibe you want to create - whether you are drawn to bold colors or prefer quiet tones. As a result, complement or contrast the furniture with cushions, throw rugs, mats, and other accessories in contrasting colors and patterns. Solid colors work well since they can be livened up with different colored accents depending on the mood.
As a general rule, avoid huge patterns on small upholstery and vice versa, as this does not do the pattern justice. Select designs that will draw attention to the geometry of your furniture. Stripes or geometric lines, for example, would look fabulous on sleek, straight-lined seats, making them appear taller or wider. On the other hand, round-edged sofas and ottomans may easily pull off flowers and tribal prints, oozing warmth and happiness in the living room. When selecting a pattern, keep the size of the room in mind. Bold patterns work well in large spaces, whereas miniature designs work well in small areas.
Even if you find your ideal fabric that meets all of the above criteria, it is critical to understand how much wear and tear your sofa can withstand and whether you are prepared to provide the necessary care. If feasible, obtain a cloth sample, then stretch and compress it to determine if it substantially affects its structure. If your furniture is placed in direct sunlight, avoid natural materials such as cotton and linen because they fade over time. Microfiber fabric and hypoallergenic cushion fill are ideal for people with allergies since they don’t attract dust. Outdoor materials that are stain-resistant, distressed leather, and vinyl are suitable for families with children and dogs. Besides these options, consider deep cleaning your upholstery whenever you have the time.
]]>
There is a lot of pressure and tension when you’re decorating your home from scratch- what style suits best, what should you buy, where do you put it, and so many more questions that need answering. The problem is, most people rush into it without planning it out and, thus, the result turns out disastrous. Following are a few ideas to guide you for complete home decoration:
The first and the most crucial step in house decorating is picking out a style that goes with your home. To be on the safe side, it’s better to go the same outline for the interior and exterior if you’re not much of a creative person. When picking out styles, take your time and explore various patterns, details, textures, and materials. Additionally, your home should represent your personality, so pick the styles that display your personality. After all, your home is your safe place to decorate it exactly as you want. Common design themes include vintage, modern, contemporary/minimalistic, and transitional (combining traditional and modern approaches).
An empty room can trigger anxiety and stress in many individuals. So, instead of trying to decorate your home all at the same time, follow a step-by-step process. Take a deep breath and choose one room for which you've got the design laid out already. This trick will help you organize your journey of decorating from scratch. If you can't decide which room you want to start with, think about which rooms you spend most of your time in. For instance, bedrooms and living rooms should be decorated before guest rooms or the patio. Let out your inner artist and mix and match styles across the rooms. It will give your home more appeal, but make sure to add a unifying element in all the rooms for a smooth pattern.
Decorating your home from scratch can be a lengthy, expensive, and tiresome process. At the same time, while people avoid contacting experts for fear of spending money they could save, doing it on your own can cause various issues. You might not have professional market insight, you might be choosing the wrong materials, or you're just decorating it wrong- these are some cases where having experts by your side can make the process easier. For this reason, you can contact a professional service provider to help you out with the design at reasonable rates. Another option is to contact home designer stores; some even offer free consultation! Instead of moving in the wrong direction and then regretting it later, why not seek expertise on these matters at the start.
The best thing about paint is that you can always replace it. Don't play safe in choosing out a bold or vibrant color for your wall. One of the best tips in the painting process is to paint the wall you want to be the main center of focus in a color that may be a little too bold for your taste. That will be your focal wall, and then use a lighter shade of that color in small accessories like pillows, rugs, or vases to bring the look together. Decorating your home is a marathon, meaning you shouldn’t rush into buying things all at once. Instead, keep your options open. Spending time in a room always gives you more idea on how you want it to look a few months down. Trying to save some from your financial spending? Buying second-hand furniture can be a neat option in this case. CleanPacs can be your trusted source if you need more tips regarding organizing your bedrooms or closets.
]]>
More things are lying around your home that could serve multiple purposes if you just think out of the box. Most of us don’t even consider that a common household item could do more than that one job it was made for. But, it’s time to think outside of those conventional ways and put the things in your home to good use! Here are some examples of household items that could make your life easier with their unconventional usage.
Do you have old, stained silver items, whether cutlery or jewelry, lying around your home? It’s time to give them the sparkle they’ve been asking for. Simply squeeze a tiny amount of ketchup onto a paper towel and gently massage over the tarnished spots. If the stains persist, let the ketchup stay for 15 to 20 minutes before rubbing with a soft cloth and rinsing it. For textures or patterns on the silver, use a toothbrush to get to every corner of it.
Even with a sharp knife, getting a clean cut on cakes and soft cheeses can be challenging. If you’re particular about the décor and layers, a knife might even destroy your delicate work of art. Next time, take out your unwaxed, unflavored dental floss from the bathroom and slowly slide it down your dessert for a clean cut. This also works well with butter, goat cheese, and other similar foods.
Traditional medical practices swear by citrus oil to repel insects of all kinds. Instead of heading to the store to buy an expensive bottle of it, simply use the peel! Rather than discarding citrus peels, put them to fight the good battle of a "pest-free house". Keep your lemon peels and place them outside your home along window sills and crevices to keep spiders, ants, and other nasty crawlers away. You can also use lemons to clean copper by combining lemon juice and salt or baking soda. Then, using a soft cloth, rub over your copper, rinse with warm water, and apply a little elbow grease while drying the item.
Don’t throw away your coffee filters either! You can use them to get rid of the tiredness after a long day at work. Coffee filters work remarkably well when it comes to relieving swollen and itchy eyes. It’s an easy process- refrigerate used coffee filters, fold them in half, and then place them over your eyes as a cooling compress. Additionally, coffee filters make excellent cleaning rags for a variety of cleaning tasks. Because they are lint-free, they are ideal for cleaning computer monitors, televisions, and windows. Even the most reflective surfaces will be streak-free and squeaky clean.
Before spending a hefty amount of money on getting your clogged sink fixed, give baking soda and white vinegar a chance. The first step is to toss 1/2 to 1 cup of baking soda down the drain. Then, slowly add in an equal amount of white vinegar and set aside for five minutes. After that, flush the drain with a gallon of hot water and run the water to see if it’s mission accomplished or time to call your plumber. Most likely, if the damage isn’t too extreme, this trick will work magically.
Insect bites, primarily mosquito bites, can cause intense stinging and swelling, especially if sensitive to them. The good news is that when applied to exposed body parts, deodorant spray or stick can work as a mosquito repellent. If a mosquito bit you, swipe it on the bite to relieve itching. The aluminum salts in the deodorant aid in the relief of pain and swelling.
Honey can make your hair shine. While there’s no comprehensive research to prove this fact, there’s no harm in providing your hair with a bit of extra nourishment. Make a DIY hair shine: 1 teaspoon honey dissolved in 4 cups of warmcups warm water, and a few drops of lemon juice. Pour the mixture through your hair after shampooing. Do not rinse; instead, dry.
The same water that is essential to survival and even household chores can cause a headache when it leaves tough spots in our bathrooms, kitchen, car, and other surfaces. Here are some basic facts you should know about the severity of water spots depending upon their hardness. When we talk about water's "hardness," we're referring to the mineral levels in it. The longer a water flow passes through minerals and picks them up, the harder the water becomes. Luckily, Cleanpacs provides effective cleaner kits that you can use to get rid of these tough stains. Besides that, here are some tips you can use the next time you can’t get rid of a water spot.
Water flow and soapy products attract many water stains on different surfaces, from toilet seats and sink to shower knobs and floor tiles. An effective way to treat such stains on showers and tubs is to create a white vinegar and water solution in a spray bottle. Pour an equal amount of both and spray on the spot. Let the solution sit for 15 minutes, and then wipe with a dry and clean microfiber towel. However, not many people, especially those with regular jobs, get the time of the day to do this chore. A quick and efficient way to keep your bathroom spick and span is bathroom cleaners. Just spray wherever you find stains and wipe!
Water spots on windows and glass give a dirtier look than these surfaces are. Depending on the water source, your windows are bound to look dusty and have patterned or dotted water stains all over them. If the head of water spots on these windows is rain, use a repellent to keep them safe and allow water to slide off the windows rather than staying on the surface. For older windows, utilize a glass sealer or polymer coating. While these are preventative measures so that you don't have to wipe your windows every time it rains, a glass cleaner comes in handy to clean the water spots that have already settled on these surfaces.
Not many know about this, but frequent car washes can damage the paint coating of your vehicle. When the water evaporates, it leaves behind water spots and gradually wears out the car's shield. If you're washing your car with water that contains calcium and metals, that's even more dangerous. Not parking your car in the garage and letting it sit in the rain can make your vehicle come in direct contact with harmful pollutants in the shower. Therefore, never let water spots dry entirely; instead, work on them as soon as possible. The best solution for this problem is to use distilled white vinegar. First, use your regular car wash to clean it. Rinse, and then use the distilled vinegar. However, using distilled vinegar can strip the wax off your car. So, if that's not something you'd like, gently scrub your vehicle with a gentle car wash. Another tip is to wash your car on sunny days so it can dry quickly.
Laundry seems to be a simple task that doesn’t have anything complex to it, right? Especially with the invention of these automatic machines, all you have to do is load the laundry, add the detergents, and as the French say, Viola! Fresh and clean clothes. Unless you pack your clothes and send them off to a laundry service, you should really be aware of how to do your laundry. Was there ever a time when you had a terrible laundry experience?
There's more to know than just how to separate delicates from denim clothes. You are most likely making mistakes you wouldn’t even give a second thought. Fortunately, several laundry hacks can assist in avoiding such errors, and we're here to tell you about them.
Washing clothes means you need to sort them out properly if you don’t want your favorite dress shirt to wear out anytime soon. Separate muddy or heavily-stained clothing from lightly-stained garments. Denim and other abrasive fabrics should not be mixed with delicate clothes. When it comes to jeans, wash them inside out in cold water on a gentle cycle. To avoid fading, dry them at a low temperature. When you are washing bed sheets as well, load them one at a time with smaller pieces of garments so that the bed sheets don't twist and stretch.
If you’ve fallen victim to the trap that more detergent leads to cleaner clothes, you’re not alone. However, excess detergent might leave allergens on your clothing, causing rashes, particularly if you have sensitive skin. If you believe your clothes are not being cleaned properly, try a mild detergent that does the job and won't damage your clothes instead of pouring half the detergent bottle into each laundry cycle. Use half the amount of detergent you usually use, then gradually raise the amount if your clothes aren't as clean as you'd want them to be. Also, hard water requires more soap than you would typically use. Check the hard water recommendation on your detergent bottle. And if you’re looking for something extra, Cleanpacs also offers scented laundry detergent to make your clothes smell like you walked out of a lavender field!
Even if you know how to wash your clothes, it’s recommended to check the labels on your clothes so that you’re washing them according to the instructions. Proceed with caution if it says "dry clean only." Silk and linen, for example, can be hand washed and air-dried. However, it's best to stick to the label with suede, leather, and other structured garments such as suits and blazers.
Many people believe that aggressively scrubbing a stain with detergent is the best method to remove it; it's one of many people's most typical laundry errors. Although, it may even cause the stain to spread. Here's what you can do to remove stains on your fabrics safely. Gently dab the stain with a cotton swab or a clean white cloth, working from the outside towards the center of the stain. Treat the stains as immediately as possible to avoid them from setting in the fabric, especially if it’s a light-colored garment.
Even if you empty the lint filter after each laundry day, lint buildup can choke the duct and increase the risk of a fire hazard over time. A big clue that your dryer is clogged is that a load of laundry takes more than an hour to dry. Detach the hose from the back of the dryer once a year and push lint out with a large brush. Another practice is to use a small toothbrush and a bit of soap to scrub the lint filter once every few months. Rinse thoroughly, and then air-dry till no moisture is left behind.
]]>
Have you ever used hooks as a keys organizer? We've all been there. Hooks are actually one of the most valuable organizational items you could have in your home. But, there are more ways to use it besides as a key organizer, and you'd be impressed by how amazing these hacks are. Say goodbye to drilling holes in your walls or not finding a place to organize small things around your home with these hook benefits.
Tossing plastic bags in the garbage or the back of the sink works for some people, but what if there's a better way to organize them, so they're right there when you need one? Install a hook in the cabinet under your sink, and that's where your plastic bags should go.
Indoor plants, specifically a kitchen herb garden, can be a blessing. However, there's a lot that goes into planting than just watering them. For instance, your herbs or indoor plants will need a sufficient amount of sunlight. Hang them near windows using hooks so that they don't die anytime soon.
Most of us have heard about hanging kitchen utensils on hooks. Although, organizing baking supplies is a bigger headache with several different measuring spoons and cups all over the place. Use hooks to hang spoons and arrange them according to their size or usage.
One major concern for many people around the holidays is hanging décor. First, you'll have to hang them and then remove them when the time comes. Hooks make this work more accessible, too; there are no unnecessary scotch tapes and single-use hangars involved. Another tip is to use hooks to create a colorful backdrop for an event setup.
If curtain rods aren’t something that’s up your sleeve, consider curtain hooks. They’re budget-friendly, much less of a hassle, and they don’t stand out. So, it’s safe to say you can hang curtains without anybody noticing that the curtains aren’t hanging on curtain rods.
No one recommends leaving your devices on the floor while they’re charging or expanding charging cables to the point that they get damaged. Here’s a better way to charge your devices and leave them unattended without any worries: place them inside a hanging hook or make a DIY lotion box first, hang it, and put your phone in it.
Are you living in an area where the weather allows you to store your vegetables outside the refrigerator? Make use of it then! However, instead of letting them pile them in a corner and cluttering your kitchen, make a rack out of hooks and baskets. A multi-tiered stand can even provide more space.
For wires and cords sticking out and giving your room a messy look, hooks provide a solution. Attach them to the furniture or nearby walls and pass those wires and cables through that, making them look much more organized.
Gaming often calls for a bunch of different headphones, power adapters, cables, etc. It’d be so much simpler when they’re untangled and organized in a single area. Make a wall corner near your gaming PC where you can hang these things using hooks.
There are multiple ways to organize your kid’s playroom so that it’s neat and clean but also gives them a place to play around. Make a DIY net hammock for your kid's height. This way, they can place their toys in the hamper when they're done playing.
We've just touched the surface of an endless list of things you can do by using hooks around your home. The best part is you can find them in all sizes, colors, and varieties. Therefore, take a trip down the tools aisle next time you're trying to organize your home in a better way.
A home gym can become an ease of mind for your workout routine. After all, you won't be needing to drive all the way to a gym facility when you have everything you need in the comforts of your four walls. While a home gym provides relaxation of working out any time of the day, there are several mistakes amateurs make when building a home gym. We're here to guide you through them so you don't make the same ones and set up the perfect home gym.
You might be thinking about equipment when it comes to common mistakes whilst when building a home gym, but you're not thinking about the very first stepping stone- choosing a location. The location you decide to set up a home gym in is crucial. While it's true that the basement, an extra bedroom, or even your work-from-home office could transform into a gym, you need to look at the space. Carefully consider each area and choose the one with ample space and light, so it doesn't look too stuffy when you place the equipment in it.
You're going to be working out and sweating those glands in your home gym, which means you need ventilation in that area. Proper gym facilities ensure lots of ventilation, so it doesn't start getting humid and smelly when several people are working out. Yes, it's only you and your partner in your home gym, but you still need adequate ventilation. Ensure that your home gym has proper ventilation pathways and a source of fresh air.
We're at the terrifying task of setting up budgets once more. Unfortunately, you can't run from it because if you don't have a budget plan that you're following when buying home gym equipment, you're prone to spending more than you should and financially stressing yourself out. Also, a detailed budget that provides an overview of how much you're spending. Furthermore, that will keep you on track to buying a specific number of gym equipment you actually need instead of cluttering the space with unnecessary equipment.
Another amateur mistake many suffer at the hands of which is selecting the wrong equipment. This could mean you're either ripping yourself off by buying expensive equipment that you could find somewhere else at reasonable rates or getting cheap versions that'll break sooner than you'd think. Another thing is buying gym equipment that doesn't align with your fitness plan. Instead, make a list of the equipment the workout you're going for needs and go for that. Compare prices of different retailers and stores, and don't just check the price but the reviews and quality.
Now that you’re all done building your home gym and you’ve started working out in it, keeping cleanliness intact is just as important as the rest of the to-dos. Burning those calories and sweating in the gym means millions of germs residing on your gym equipment and all over the room. Clean the space daily by adding it to your daily chores list or weekly if you don't have the time. Also, make sure you disinfect the equipment every week using an eco-friendly disinfectant that does the job to stay safe from those dirty germs.
It's time to get started on a proper workout routine now that you've your home gym in place. Keeping the motivation levels up is hard, but just as you can motivate yourself to clean your home, make a list of things that can encourage you to take time out for the gym daily. Once you're in the groove, you'll gradually start loving this new space in your home!
]]>
Pegboards lying around your home are a fantastic organizational supply if you haven't already noticed. There's so much clutter inside your home, and these pegboards could help put, or shall we say hang, them in one place. Using pegboards to organize things in your home is definitely a tip that stands out in this year’s best organizational techniques. We're here to guide you through the many ways you could do this!
An essential benefit of pegboards nowadays is as a storage organizer for just about anything and everything. Whether your kitchen needs a place to store those oddly-shaped whisks and spatulas or your garden shed is in dire need of a spot to hang those cords and wires, use a pegboard for the purpose. Anything you put your mind to organize, you can use a pegboard to declutter the floor and cabinet space.
Small accessories, especially jewelry, scattered around your room without a proper organizing space increases the chances of losing your favorite pair of earrings or that ring you've been waiting to wear. Hang your dainty pieces on a pegboard, or for a more organized look, hang small boxes of different shapes and sizes and separate your accessories in them. Belts can go as they are on the pegboard, and they even give an overall colorful look!
Your kids’ deserve a space in the house where the art they’ve put all their love into can go. Instead of accidentally tossing them in the trash or taking them out when decluttering paper from your home only because of less space, use a pegboard. Hang the drawings, those hand-printed paintings, and macaroni art. They’ll look so much better brightening up your home than lying there forgotten in playroom drawers.
For all those garden enthusiasts out there, this one’s for you. If you’ve been thinking of a way to give your garden a whole new look without spending hundreds of bucks on it, a pegboard does the job. Position a pegboard on one side of your garden’s wall and hang pots and planters on it. You can give it a greener look by hanging vines through it too.
Everyone needs a motivating aspect to bear with working through the day. Create a motivational work center for your work-from-home space or if your office allows you a private area. You can hang a calendar, motivational quotes, your family's pictures, colorful office stationery, and funny photos that will encourage you to keep going.
Utilizing a pegboard as a home for your pictures is the organizing hack you've been sleeping on. You can customize it according to your creativity instead of going for plain, boring frames for your photographs and damaging the walls trying to put a nail to hang them. Family portraits, landscapes, night skies; they can all go up on this gallery wall.
Small bedrooms need as much space as you can give them without adding unnecessary furniture. Instead of placing large-sized side tables on your bed, a headboard is a better option. And what better way to save your money AND get an organizing space right above your bed than a pegboard? You can hang items like indoor plants, alarm clocks, mirrors, and small lamps.
Does your living room need a bit of dazzle to brighten up the room? A pegboard can come in handy! Add floating shelves to the pegboard, and it can become the ideal space to place your books and art. Or, maybe make it a key organizer to hang keys of your home, car, garage, etc., without ever losing them.
If you've never thought of all these ways to use a pegboard, it's time you do! Redesign your home with this sustainable tip that uses a pegboard, which you would otherwise think is trash.
With the hot summers bidding goodbye and the cool breezes welcoming the fall season, it's time to prepare for it. If you're not getting ready for the season and the weather changes on time, chances are you would have to do it somewhere around the holidays. It would be best if you kept those weeks of the calendar free for the holiday celebrations. Here's what you need to do to prepare for the season:
The fall season means holidays are right around the corner. With Halloween coming up, followed by Thanksgiving and Christmas, it's undoubtedly a busy season. Therefore, getting things out of the way when it comes to prepping before the holiday season is something you don't want to miss out on. Make a list of the chores you want to tackle before the holidays. And, don't forget the most important thing! Set a budget for the holiday season, and don't overspend.
The fall season is when the weather starts getting chilly, and you need to buckle up for it. It's time to store your summer dresses away and take out your winter clothes. Replace cotton blankets with warmer wool, fleece, or polyester blankets according to how cold it gets in your area. While you’re at it, inspect the heat radiators before you have to turn the temperatures up when it starts to get really cold.
Fall screams apple crumble pies, pumpkin spice lattes, butternut squash soup, and so much more! With some of the best seasonal fruit and vegetables available at this time of the year, you need to take time out to step into the kitchen once more. There are tons of popular fall recipes across the internet. They're fun to make, and they'll also have you licking your fingers and going back to the recipe again and again.
No one has enough time to deep clean their home every weekend, that's true. But, instead of running around and doing it half-heartedly only when holidays are the next day, why not do it timely? With fall about to transcend, this is a free slot in your calendar to deeply clean your home correctly without rushing through it. Once again, make a checklist of everything you need to do, including purging refrigerators and decluttering wardrobes, to get your home spick and span and go through it one chore at a time.
Trees tend to shed their leaves all year round. Although, almost all types of trees shed their leaves during this season, even if they don't in other seasons. So, the first step to getting the hang of your garden for the fall is to clean up the garden. Rack, rack, and rack! Dispose of the leaves in a compost bin. Also, it's probably time to prune your trees, but instead of chopping down the branches and doing more harm than good to your trees, call a professional.
When we say cozy, we mean cozy. Dim down the lights in your home and go for more aesthetic, low lights. But, here's the thing. Arguably, the most important thing you could add to your home to give it the fall season vibes is fall scents. Buy a few scented candles like apple cinnamon, sandalwood, forest woods, etc. and watch, or should we say smell, your home liven up instantly. You could also make potpourri and have your guests admiring the pleasing scents wafting through your house.
There's a lot more to the fall season than just decorating for the holidays. You need first to get your home in order before you start on the décor. This way, your home will be truly ready for the season and the joy of the holidays!
If you've been using your garden shed as a dump, it's time to turn around this part of your home. Granted that garden supplies and handy tools belong in the garden shed. However, what matters is whether you're throwing random things around and cluttering the space or giving your garden shed the organized look it deserves. Here's how you can do that:
Your garden shed is not the place for stuff that doesn't have space inside your home. So instead, learn the art of decluttering what actually needs to go out of your home and your garden shed, like worn-out supplies, your kid's old toys, etc. Some other items that absolutely do not belong in a garden shed include valuable metal objects, alcohol, canned food, paint, and glue.
Chemicals are a safety hazard. If there are chemicals in your garden shed and out of place, the slightest slip can cause irreparable damage. And when it comes to homes with kids, all types of chemicals should be out of range. So, keep the chemicals stored in one place- maybe a cabinet or drawer. Additionally, you could put them in a basket; they're handy and help organize these products in one place. Additionally, go with eco-friendly cleaners that don’t contain harmful chemicals.
Not all of your garden shed supplies belong on the floor in boxes. They take unnecessary space that you could utilize in other ways. Think out of the box and take advantage of unconventional storage spaces, although they've become pretty popular too, like wall-mounted organizers, ceiling hangers, hooks, pegboards, wall slat systems, etc. The best part is that you can easily hang garden supplies on walls that otherwise take lots of space. There are tons of ideas when you start using your creativity!
A nail in one corner and a bolt hiding under the table. Your small pieces of hardware are likely all over the place. You'll often need these tiny tools for repairs here and there in your home. So, it's better to store them in one place where you can grab them quickly without turning over your entire garden shed. Use glass containers for this purpose and separate the fasteners into different jars. Place the jars, ideally, on a shelf in one spot.
Not everyone has a garden shed the size of their home, and if that's the case with you, you'll have to work with the area you have. Fortunately, there are more small-space options than ever before, including foldable workbenches. Opt for a foldable workbench rather than setting up an entire wooden surface when you're short on storage space. It'll get the job done, and you can fold it afterward and put it away.
One thing you may not have planned in your garden shed storage redesigning is electricity and lighting. Mismanaged power sockets can result in not being able to use tools like electric drills easily. Therefore, position them in inaccessible corners. Similarly, for a garden shed storage where you'll be spending ample time working on building, repairing, or maybe even breaking stuff, you need light, or this will fail. Invest in proper LED or solar-powered light bulbs that provide ample light to brighten up your garden shed.
Once you have these garden shed storage hacks planned out and you're set to get the work done, don't forget about maintaining this space after you've decluttered it. After all, putting in all this work only to make your garden shed a garbage site again in a few weeks doesn't make sense. So instead, to make it manageable, clean your garden shed weekly with the list of your other weekly chores.
]]>
Whether you love laundry day or not, it's a chore you can't escape away from. Your laundry room can be dark, too cluttered with piles of clothes in every corner and plain. Or, on the other hand, it can also be a fun yet minimalistic area that maximizes functionality and storage. So, if you're looking for better ways to organize your small laundry room, here are some hacks to revolutionize your laundry game.
Tossing your laundry supplies and misplaced clothes wherever you find a free spot in the laundry room may seem convenient. However, with some transitions to better storage options, you can save yourself the trouble of a messy, unorganized laundry room where nothing is where it should be. For a trendy yet eco-friendly look, shift your laundry supplies to glass or plastic containers. You can switch to eco-friendly laundry detergents as well to play your part in saving the environment. Also, place baskets in the laundry room. You can never go wrong with baskets, and they'll help in keeping your supplies in one corner.
Most of us overlook the narrow spaces in the laundry room because what possible use could they be? These tiny spaces make a world of difference when it comes to small laundry rooms. Invest in a slim rolling cart with multiple tiers, and you'll already have a place to store so many things without cluttering the space. Here's another idea: benefit from wall-to-wall or maybe cabinet-to-cabinet tension rods that'll provide an ideal option to hang your washed clothes.
Anywhere and everywhere in a laundry room can be disguised as a hanging corner. For instance, why not add a few hooks to the side of your washing machine or dryer. You don't have to use cabinets to store clothes or supplies inside it; use the exterior to hang your towels. Walls come in handy for hanging organizers or hooks that’ll let you declutter without taking up more space. If you’re worried about drilling a hole in these places, magnetic hooks or organizers are the alternatives you need in your life.
Think out of the box and use your cabinets stylishly that even adds much more storage. For example, organize dirty/white/black/colored clothes in each cabinet separately, so they're right there when you need to grab them and save up some time. This trick will also save time between having to separate a massive pile of clothes. Another creative idea is to hide your washing machine and dryer within customized cabinets, especially if you don't have a designated laundry room. They'll be right there in the kitchen, and no one would notice
Ironing boards that take up tons of space are a thing of the past. Instead, minimalistic designing calls for wall-mounted or foldable ironing boards that you can take out whenever you need them and then put back in place. You can even hide them in a closet. If neither of these options works for you, go for a simple ironing blanket.
Hampers take up space, that's a given, but they're also convenient when it comes to separating and organizing your clothes. Many people use them as a 'dirty laundry basket,' and it works! Low on space? Go for expandable/collapsible hampers that you can compress when they're not in use and expand when they are. We suggest buying double-compartment expandable mesh hampers too so that you can easily separate your clothes without a fuss.
It’s true; you work with what you got. Although, it doesn’t mean a small laundry room is fated to be the messiest area of your home. With these tips, let your creativity direct a redesign, and your laundry room can quickly become a place of comfort rather than a traumatizing laundry experience every week.
Imagine living an incredibly unhealthy life without knowing about the damages you're doing to your physical and mental health. Unfortunately, that's what most of us do, without even realizing it. If you've recently come to terms with your messed-up routine and want to change for the better, we've compiled a list of things that'll help you achieve that. Here's what you can do:
The first step to a do-able healthy routine is identifying your current unhealthy habits. Then, you can observe your daily routine and write down what you need to change before adding healthy changes to your life. Once you've recognized the bad, you can eliminate those from your daily routine and move towards the good part. Next, plan out a healthy lifestyle; maybe consider adding weekly, monthly, or annual goals that'll keep track of what you want to accomplish.
For decades, people have stated that a nutritious, balanced diet can do wonders for your mind and body. Recent studies back up this statement too! With a diet full of nutritious, whole foods like fruits, vegetables, grains, dairy, and meat, you’ll feel far more energetic than by relying on junk and fast food. To make the shift easier, prep your weekly meals on the weekend. Also, instead of giving in to your unhealthy cravings, you can always find dozens of healthier substitutes of that same recipe.
You've been eating healthy, keeping yourself hydrated, and leaving the junk behind. You don't really need to work out daily, too, right? Wrong! Physical exercise is as essential to a healthy lifestyle as a nutritious diet. Especially during these last two years where most of us have gotten accustomed to the work-from-home life and sitting on a desk the whole day, exercise plays an integral role in maintaining health. Of course, you don't have to do a two-hour long strenuous workout either. Just make sure you move around for a few hours every day, even if you're only doing your daily cleaning chores.
It's time to take action by the statement- self-care above everything. Suppose you're not looking after yourself and giving yourself the 'me time' you deserve every once in a while. In that case, nobody's going to do it for you, and your health will automatically deteriorate. We suggest doing what you love for a small portion of your day every day, or on the weekends if you're a parent or a working person that is too busy to take out the time daily. What can you do? Take a relaxing bath with bath bombs, read for 15-30 minutes before going to sleep, or hang out with your friends. Anything and everything works as long as it's something you love and gives you the break you need.
Your surroundings and the people around you have a significant impact on your routine, too, believe it or not. Choosing to hang out and have conversations with positive people can make a difference or, in other words, inspire you to change your lifestyle. Remember, those who bring you down and can't encourage you to achieve your healthy lifestyle goals don't belong in your life. Additionally, give a thought to your surroundings too. If you've been cooped up in your home or running from home to office only, it's time to take a short vacation and reconnect with nature. These may seem like small things, but they're what can inspire you to live a healthier life.
With the recent pandemic wreaking havoc on life as we used to know it, it's time to get back to a healthy routine slowly. It may get overwhelming at times, and that's understandable, but small steps of progress are always better than no progress!
]]>
Facts indicate that one million single-use plastic drinking bottles are purchased every minute globally. Moreover, our oceans are dumped with 8 million tons of plastic bottles every year. Imagine how much plastic we've dumped on our planet over the years, and continue to do so, leading to irreversible impacts like the alarming climate changes. For each of us, it's our responsibility to eliminate the usage of plastic bottles and shift to eco-friendly options. But, what can you do with the plastic bottles already lying around your home? Here are some creative ways of contributing towards reducing plastic in the environment by recycling plastic bottles:
There's no limit to the infinite art projects you could create with plastic bottles. They make you use your creative skills, have fun, and recycle plastic; it couldn't get any better! Maybe start with a plastic bottle piggy bank. Or a DIY pencil case with a zipper on it too? You could also make artsy vases, chandeliers, aesthetic lamps, and mosaics with them. The best part is that you don't even need extra supplies. Instead, a pair of scissors, glue, chart paper, and paints will do the job in creating most if not all of these projects.
If you're tired of buying watering cans now and then for your backyard plants and trees, this is THE hack for you. Grab a plastic bottle and poke small holes on the cap; try using a ballpoint pen for this. Fill up the bottle and take it outside to water your plants, and voila! Easy and effective. Another similar idea is to fix a pipe to the opening of the plastic bottle and poke holes on the horizontal base. Let the water run, and watch a plastic bottle become your very own DIY sprinkler system.
Undeniably, plastic bottles make ideal storage containers for multiple purposes too. Whether you need small storage containers for your pantry to separate spices or somewhere to keep your color pencils, plastic bottles come in handy. Magazines lying around that you don't have the heart to throw out? Roll them up and keep them in plastic bottles. Then, you can take it up a notch and decorate or label them to avoid a plain and boring display.
Plastic bottles redesigned to make hanging baskets come in handy and make great decorative pieces for your home. Get your scissors or cutter and cut your plastic bottles to make a hanging charger dock. Here's another revolutionary idea: make a vertical hanging garden on your lawn's wall. All you need is plastic bottles and strings! You'll save space, add greenery to your home, and make it look incredibly creative too.
Not everyone has a whole backyard attached to their home where they can grow their favorite herbs. This is where plastic bottles step in and make your dreams come true. Think of these bottles as planting pots. Cut plastic bottles, add soil to them, and plant the herbs. Of course, you can place them in your kitchen too. Just make sure they get adequate sunlight, and you have a DIY herb garden in your kitchen without having acres of land.
If you don't want to get your hands dirty when gardening, make a garden scooper with the plastic bottles you're never going to use again. Instead of buying a garbage can, if you've large plastic bottles going to waste, you can reuse them for this purpose. Make the trash into a trash can, and the planet will be thanking you in the process. Use plastic bottles and recycle them into unique jewelry pieces. If you have kids and they've been asking for a fun costume, a plastic bottle jetpack is a way to go.
There's so much you could do with plastic bottles. We only touched the surface with these handfuls of ideas. It's all up to your creativity. So, collect the plastic bottles in your home and neighborhood and get crafting!
The winter season has many people worrying about the problems that come with the colder weather, including laundry. When the first blows of winter's cold breezes welcome the season, it's time to take out your winter clothes. Though now that winter is upon you, how will you dry your washed clothes with all that snow, winds, and moisture? Also, let's not forget how much harder it is to wash bulky winter clothing than summer's light garments. Luckily, all these issues are manageable when you're working on the right track with these tips:
When you unpack your winter clothing, the first and foremost thing you need to do is carefully identify each piece's fabric and read its labels. While you can rest easy knowing that wool can be machine washed, the same rule doesn't apply to every winter fabric. Some can only be hand washed or dry cleaned, there’s no other way.
Handwashing or dry cleaning winter clothes each time they need to go in the laundry isn't a feasible option for many people. Tossing your winter clothing in the washing machine once a week or every two won't harm them unless your washing machine's settings are NOT set to gentle, or the fabric absolutely cannot be machine washed. So, if you are going to machine wash your winter clothes, make sure you fix the settings to be gentle for washing and drying.
Washing or not washing can be a mind boggling question, especially when it comes to the delicate fabrics of winter clothes. Experts suggest wearing base layers underneath jackets, sweaters, and coats. This way, your base layer will need washing since winter fabrics should not be washed routinely. On the flip side, if you get any stains on your winter clothes, it's best to wash them as soon as possible. Treat the stain with an enzyme-based fabric stain remover before washing so the stains can get out quickly.
While you may think the decision of which detergent to go for depends on your preferences, it actually depends on your clothes. Some individuals suggest using a strong detergent with cold water to save energy. While we're all for eco-friendly tips, strong detergents can also damage the fabric of your winter clothes. It's better to use a mild eco-friendly detergent with a few extra minutes in the washing machine than having to buy new clothes.
Drying in the winters is an impossible task with those warm, sunny days long gone. Of course, this means your clothes will need all the help they can get to dry quickly after being washed. If you're using an automatic dryer to dry your clothes, give them 5-10 more minutes or an extra spin to eliminate as much water and moisture as possible before you air dry them.
You can still line dry your clothes in the winters. You might be questioning how that would be possible, especially if it rains or snows in your area. Well, instead of drying your clothes outside, you can take them inside your home. Place a rack for this purpose in a specific spot of your home. You can also make use of shower racks, wooden furniture or even hang them on hangars. Ensure an airy environment for the clothes to dry quickly, like opening the windows instead of using energy and ramping up radiators.
Last but not least is to keep your clothes safe from moisture. Clothes tend to absorb more moisture in the winters due to the cold weather. Consequently, moisture can cause a smelly odor in clothes too. So, whether you're hanging them in the closet or putting them in drawers, double-check that the place is clean and dry.
Winter clothes take fashion to new peaks with multiple layers and classic designs. These clothes can last years to come, but only if you take proper care of them. Use these laundry tips the next time you're washing your winter clothes, and they'll look good as new!
]]>
Did you know that 354,000 residential properties caught fire in 2019, as reported by the US Fire Administration? The primary causes for these fires were cooking, heating, carelessness, and electrical malfunction. However, you can prevent a disastrous cooking episode and even protect your home from catching fire due to the increasing wildfires. Follow these simple steps to make your home more fire-resistant.
It's not every day that you decide to redecorate your home and give it a whole new look. So, when you are remodeling, consider using fire retardant materials, i.e., those that are less likely to catch and spread the fire. Now, who doesn't love a wooden deck in their patio? But, materials like brick, tiles, and stone are much safer in terms of fireproofing your home. Similarly, the wall exterior and roof make the foundation of your home, so it's essential to go for fire retardant materials like steel, stucco, and concrete. Double layering the windows protects your home from catching fire, too, unlike single-layered ones that shatter on excessive heat contact.
Most homeowners forget to install smoke alarms and fire extinguishers when moving into a new place, even though it's the first and foremost checklist for safety-proofing your home, especially with kids. Some might even have these two essentials installed already, but they're outdated and need replacement or maintenance. A functioning smoke alarm and fire extinguisher on the go can prevent the risks of fire and reduce the damages if there happens to be one. Also, when it comes to these handy fireproof equipment, it's best to research and go for the most effective and efficient ones instead of saving money. You wouldn't want a faulty smoke alarm or fire extinguisher to save a couple of bucks.
You've got the wall exteriors and inside of your home all safe and sound, but you probably forget the one area which still makes your home vulnerable, the backyard. Vegetation and trees like conifers not only catch fire but spread it more quickly in surrounding areas. What can you do? Firstly, ensure your trees and shrubs get the pruning they need every year. There should be no overgrown trees or hanging branches; that's the last thing you would want. You need to consider some aspects before adding greens to your home, like going for fire-resistant trees such as Live Oak, Agave, Sycamore, etc., to give your home an extra shield barrier against fires. Keep an eye on the gutters in your backyard as well. We suggest cleaning them out weekly, too, since they can trap dry vegetation and combustible materials.
Fire doors can save your life, quite literally. Fire doors have become a raging trend, and all for the right reasons too. These doors made of fire-resistant materials can stop a fire from spreading or at least prolong the spread for about 30-60 minutes, giving you enough time to call the firefighting team and get out safely. If you have the budget, replace all the regular doors in your home with fire doors. If not, the entrance, garage door, and back door are the areas where fire can spread inside your home, so tackle them first.
Like your home's foundation, aka the exteriors, certain materials come in handy when talking about making the inside of your home fireproof. Indeed, we're talking about fireproof fabrics! Each fabric has different fire resistance, but some are solely made fire-retardant. So first, search for natural and synthetic fireproof or fire-resistant materials. Once you've done that, replace traditional fabrics of large surface areas in your home like upholstery, curtains, and carpets with fire-retardant fabric. Don't forget to deep clean these surfaces according to the instructions too!
These simple tricks can make a whole lot of difference when it comes to keeping yourself, your family, and your home safe from fire. Meanwhile, most of these are a one-time investment that'll have your home safe and protected for years to come.
Every pet owner knows how much effort goes into keeping their family’s AND their pet’s things organized all the time. Pet supplies lying around ultimately means a messy home with never-ending cleaning and organizing chores. Why not get it over with and keep those items as organized as ever? Here’s what you can do:
Many pet owners keep all of their supplies in one place. They soon realize that this might not be ideal, as their cat eats in the living room while their dog wants its meal in the kitchen. The cat is brushed in the bedroom while the dog is groomed in the living room. As a result, they run around the house either getting the supplies for one pet or putting them back. Often, the supplies end up causing clutter because they are not put back in their place. Hence, it is important to keep the supplies where they are needed and used, saving a lot of time and hassle. Keep the clippers in the washroom if you cut your pet's nails before or after a bath, instead of near the front door, where the leash and collar collection are to be kept.
Although we just discussed how important it is to keep and store all the pet supplies where they are needed instead of in one place, toys should be kept in a single box, bin, or basket. If you don't already have a box and are about to buy one, look for the one from which your pets can get their toys out easily. If you have a dog, you can buy a cute, big bone-shaped basket, and your dog might even decide to play in the basket. If you develop a habit of putting all of your pet's toys back in the toy box at night, this will help reduce the clutter, and you'll also get to know which toys your pet loves and plays with regularly.
This tip should be followed by every pet owner, as this can come in handy even in matters of life and death. Keep a single folder in which you can organize all the important documents and pertinent information of your pet, such as their eating habits, food, medications, vaccinations, and even their favorite toys. A better option is to go digital and make this folder on your laptop or mobile. This way, if you have to leave your city for a couple of days and have to leave your pet with someone else, you can give them the folder which will have all the important information. You can even use a binder or a notebook for this purpose; whatever floats your boat.
If you're busy with kids, jobs, or other household activities and find it difficult to organize and maintain your pet supplies throughout the day, this hack might work best for you. Keep a basket in each room of your house, and whenever you see something lying on the floor that shouldn't be, whether it's a toy, bootie, or a piece of clothing, throw it in the basket so that you can sort it and stash it in its actual location before going to sleep. This tip can help not only keep your pet supplies organized, but also gives your home a neat and arranged look. You can also ask the rest of your family to help you with this, even if you're the only one who knows the permanent location of all the pet supplies. All they have to do is put the clutter in the basket to be sorted by you later.
With these organization hacks, you and your pet will be a lot happier, trust us. Organizing pet supplies from scratch will seem like a lot of work at first, but it’s worth it!
]]>
Amongst the heaps of paper clutter in any home, utility bills are another problem. While you can reduce paper clutter by throwing most of it away, utility bills are important. You can’t just throw them out. However, if they’re all over the area, that’s no good either. Here’s what you can do about them:
The most common crisis when it comes to utility bills is not finding that one receipt or bill you need, just because all of your bills weren't organized in one place. So, the first thing you need to do for organizing your utility bills is to keep all of them in one place. In this modern era and digital age, where everything can be done through phones or computers, some bills, important business documents, and receipts still exist in paper form. Or, if it is available via electronically but you're not much of a tech person, you keep all of your utilities in physical form. If that's the case, you need to keep them safe and organized in one place, such as in a binder, folder, or even a caddy. Similarly, create a folder on your computer where you can keep all of the bills you've received electronically.
Many people avoid opening their bills or even getting them from the mail to evade the bad news. But, this makes the entire situation even worse. Not facing the utility bills timely is one of the top organizing mistakes you can make for your home. You end up increasing the clutter in your home, or the worst-case scenario, you might end up losing the only hard copy by mixing it with junk. So, don't delay the unpleasant task of viewing your monthly phone bill or internet charges, or dealing with the credit card bill, as it's the exact opposite of financial organization.
Even if you have a whole pile of organized bills and payment receipts, taking care of it is still a hassle. What's better than a single invoice consisting of all the transactions and payments you've done? If you are given the option of consolidating your bills, you should always go for it. Even if you're confused, you can always call and ask your provider for this specific service. Sometimes, you might even get a lower or discounted overall bill by grouping them. Even if it's a dollar, it'll be worth it. You can lump your telephone, internet, and cable or your rental, house, and auto insurance bills together. If you love the idea of having a minimalistic home, this tip also complements that, as "less is more".
Although you might have stacked all of your documents and collected them in one place, it still doesn't mean you're all organized. You need to arrange and categorize all the files somehow, and the best way to serve you is by following a systematic naming method. Work in an organization that has multiple facilities in various countries. The most convenient system can address them in the "Address - City - State - Zip Code - Utility - Account Number - YYYYMM" order. This way, once you've organized your bills according to the utility, you'll know whether you're being overcharged. If you only want to organize your home utility bills, a simpler system will work for you. You can group specific bills and use a protruding sticky note to separate them from the rest. For instance, you can use a flashcard to separate all of your electricity and gas bills.
Once you get a hang of organizing your utility bills with these hacks, your life will become so much simpler. They won’t take up unnecessary space and they’ll be easier to manage and find. What more could you ask for?
]]>
Makeup brushes harbour so many germs and dirt that you’d be amazed if you could look into them with a microscope. One of the essential elements of clear and glowing skin is using clean makeup brushes. Here’s a step-by-step process of how you achieve that:
If you're a first-timer or have suspicions that you haven't been doing it right, here's a step-by-step guide on how to clean makeup brushes:
Choose a cleaner of your liking. Many experts love using Dawn dish soap, especially for deep cleaning and washing the oil stains off makeup sponges, while others are big fans of Ivory soap. You may even use any baby shampoo. If you’ve a gentle all-purpose cleaner like CleanPacs lying around, that’s the best option. A laundry detergent can do the trick too, as long as it isn’t too harsh. Mix it in water and let your brushes sit in the solution.
Before you apply the cleaner to your makeup brush, lightly rinse the brush's bristles underwater and let them get wet. Ensure you don't get the handle wet during the process, as this can ruin the brush beyond repair. The glue gets loose due to the water, and as a result, the bristles start to shed.
Now that the bristles are wet, they're ready to be cleaned using the cleaner you've chosen. Pour a small amount of the cleanser on the palm of your hand, and rinse and mix the bristles well with the cleaner by moving the brush in a circular as well as rotatory motion. Keep mixing and swirling the brush until you feel like it's clean enough. Some people follow an even more extensive process, and instead of directly using the cleanser on the bristles, they first apply the cleanser to a towel or a brush cleansing mat. Then, they swirl the brush on the towel until they feel like it's saturated enough. Next, they swirl the brush on the palm of their hands. If you think that your hand can't tolerate the swirling and rinsing, you can use a spa cleaning glove. The bristles can sometimes hurt a lot, especially if they're not that soft.
Once you're positive that the bristles are saturated with the cleaner, and the brush is swirled enough, thoroughly wash the bristles and rinse them under lukewarm water. The temperature is ideal for the bristles. Otherwise, there's a high chance of the brush being spoiled. Keep repeating these steps if the water isn't clear and the bristles are still dirty. Again, make sure that you don't get the handle wet or point the bristles in the direction opposite to the flow of water. If you wish to keep your brush in workable condition, ensure that the water isn't splashing on the bristles by pointing them downwards. Otherwise, the glue will get loose, leading to the shedding of the bristles.
After you've rinsed the bristles clean, squeeze the bristles with your fingers to let out the excess water. Doing this helps them dry at a quicker pace so that you can use them again. But, keep in mind that you don't press or squeeze too hard, as the bristles can break.
After which your makeup brush is ready and clean enough to be used again, the last step is to wait for the bristles to dry. Although this might take a while, you can speed up the process by either using a towel or keeping them outside in the sun for a while so that they are air-dried. Or, if you're not in a hurry, let them lay on a tissue or a towel overnight, and they'll be as good as new the next morning.
You should clean your makeup brushes on a monthly, if not weekly, basis for the sake of your skin. Plus, your makeup will be far more flawless when you’re using clean brushes instead of those that have been sitting in your bathroom cabinet for ages. If you’re not a fan of the whole process, you could always toss them in the dishwasher. But, never skip washing them regularly!
If your walls have been bland, wearing off, and colorless for quite some time, maybe it’s time to revamp them. Many homeowners leave their walls behind when redecorating. You’ll see the entire look of your home transformed simply with making your walls pop.
If you haven't started decorating your walls already, the first thing to do is to make a plan on how you want to decorate your walls. There are many computer programs in which you can sketch a digital image of your wall and the kind of stuff you want to hang on it to give you an idea. If you're not good with computers, you can draw the things you want to put on your wall on a piece of paper, and then hang the piece of paper. Though, the decoration you decide to go with might look very different on your wall than the visualization you made in your mind. So, the first tip for decorating your walls is to make a plan and decide how you wish to go with it. While you’re deciding on the décor, don’t forget to clean any stains or dirt on your walls first using a multi-purpose cleaner.
Many people use their walls as a source of inspiration or motivation by hanging quotes, and this can be a great way of decorating your walls, as long as you don't spam your walls with quotes and sayings. Many experts limit the number of quotes to only one piece per room. Having too many words or quotations can not only be too chaotic for a room, but also to you, your household members, or your guests as they might feel like they’re being shouted at by the room from every angle. Even if it's a gallery, stick to only one decoration piece or a wall hanging with a saying if you feel like it. Otherwise, it'll be less of a decorative item and more of a nuisance.
Mirrors are a great way of decorating your walls, but sometimes, people overuse them or don't hang them strategically. Doing this can have a bad influence on the vibe of the entire room. On the other hand, if you hang up mirrors smartly and properly think it through, mirrors can not only make your walls look more aesthetic, but they're also a great way of making the room look bigger and brighter. The light reflected from them plays an illusion on the eyes and can be a great way of decorating the walls of a small room that doesn't get much light naturally.
Hanging pictures on the wall is something that almost everyone does, but with just a little variation, it can add to the beauty and glamour of your room even more. The tip is to go with a variety of frame sizes instead of sticking to just one. If you had wall hangings and portraits of different sizes and were afraid that they wouldn't get along, you'll be amazed at how well it all comes together in the end. Experts at home decor also think that mixing and matching different styles of frames together can make all the difference in decorating your walls.
Even if you're not that proficient when it comes to wallpapering your walls, you can try this in a small powder room or in the attic to see how well it goes. But, once you get the hang of it, you won't need any other decoration on the wall you've wallpapered. If you need some ideas, you can use your wallpaper on the upper quarter of the wall and mold on the remaining area.
These were just a few tips on what you can do to make your walls stand out. Besides these, there are tons of creative ideas on the internet that you can utilize according to your preferences. Let your creativity run wild while you add to that plain beige paint on your wall!
Evening routines are a chaotic mess. You're too tired to do a full-on sweep, but your home is too dirty for you to sleep soundly. Plus, leaving it for the morning means the burden of bearing more work. Procrastination is never a good idea, which is why it's better to make an evening cleaning routine and cross out those tasks from your list before going to bed. If you have no idea where to start, here are five tips:
This tip can save you from a great deal of heartbreak and low self-esteem. Before you start an evening cleaning routine, make a feasible plan. Divide all the work to be done across the week, and make a cleaning routine that comprises 30-40 minutes, at most. Another way is to only start with 1 task, and when you get used to it, add another to your daily routine, and so on. Go with whatever floats your boat, but make a slow start and stick to it. Some people feel energetic and enthusiastic while starting a new evening cleaning routine and decide to start big. But after a while, it becomes difficult to cope with the hectic plan, and people eventually stop. So, make a plan that you can slowly, steadily, and consistently build on.
Many people hate the idea of waking up to a sink full of dirty, unclean dishes. Such a negative, unhealthy start to the day can greatly affect productivity and worsen your mood. Hence, it is recommended to add putting the dishes in the dishwasher right after dinner in your evening cleaning routine. You can ask your partner, parents, or kids to help with it by making them put their dishes in the dishwasher themselves, instead of puttingthem in the sink. This way, you'll also be relieved from such a great amount of hassle by utilizing only 5 minutes of your evening.
Before you go to bed, give your living room a visit and organize it. There might be some clutter waiting to be sorted or some pillows waiting to be straightened. Look for all the remotes while you're at it and put them back in their right places. Also, fold the blankets on the furniture. Experts believe that straightening the living room as a part of your evening cleaning routine is a fruitful avenue.
The kitchen is probably the busiest place in the house in the morning. If the kitchen is already a mess, it'll make your morning even more hectic and difficult. So, before you sleep, make sure to declutter your kitchen. Clear all the counters and give them a light clean using a kitchen cleaner after you've wiped the stovetop and light switches. Put any edible items or leftovers back in the fridge. Clear the garbage disposal and pour a few drops of lemon juice to make it spick and span. Within 15 minutes, you'll be done with the kitchen, giving yourself more time and energy for the morning.
Having a bath before sleeping makes the sleep infinitesimally more peaceful and relaxing. Once your kids realize this, you won't even have to convince them to take a shower before sleeping. It saves plenty of precious time in the morning, in which you and your kids can have breakfast and get ready for their day without having to do anything haphazardly. You can also try this for yourself but be warned that once you adopt this habit in your daily evening routine, it'll be almost impossible to leave it.
Getting these tasks done before you crash into your bed can make the next-day chores a lot easier. And, it may even brighten up your morning when you've already gotten rid of half of your home's mess the evening before. It may look like too much work initially, but once you get it rolling, you'll see how simpler your routine becomes.
Minimal decor is all the rage in these modern times. It’s light on the pocket, gives your home a gracious and exquisite look, and never goes out of fashion. But, how do you go minimal alongside keeping up with the latest home trends? Here’s what you can do:
You might need some extra upholstery cleaners, but otherwise, there's nothing that can go better than a neutral base for minimal home decor. With a clean, fresh look, a neutral palette radiates a serene vibe that keeps the eyes of you, your household members, and your guests relaxed. You don't necessarily have to go for a bland white color for a minimalistic touch. On the contrary, many pundits recommend barely-there gray, beige, and taupe, as they are intrinsic to a minimalistic home. Or, giving the white paint a yellow undertone can be ideal, as it gives a creamier and warmer look. You can also try a blue undertone, but this will give a slightly crispier appearance. You can also mix earth-tone browns, tans, or greens. They're easy on the eye and go great with neutrals.
Professionals in home decor won't stop talking about keeping the clutter away when it comes to minimal home decor. This tip goes with the basic principle and rule of minimalism, that "less is more". Don’t carry the burden of having too much stuff - get rid of anything that hasn't been used in over a year. You can't embrace the minimalistic approach if you have random objects cluttering every surface. Junk mail, old bills, car keys, and dirty dishes somehow make their way to a kitchen countertop. Please get rid of them instantly, and make sure it stays that way. If you or any of your household members are having trouble getting on board with this idea, you can keep a "clutter basket" somewhere accessible where everyone keeps the clutter, and at the end of the day, the contents of the clutter basket are put in the right places. If you also want something stylish while staying minimalistic, you can go for a white and red wine combination, especially in the kitchen, as it gives a spacious impression.
To create free space, you'll have to do some tinkering with the setup you're already using. If you have the funds, replace any bulky furniture or appliances with smaller counterparts that will also fulfill your needs without compromising comfort. You might have to say goodbye to a few bathroom shelves or kitchen countertops, or remove unneeded walls if necessary. Following this tip will increase your living space exceptionally and hence, help you create a minimalist home.
Another tip for minimal home decor is creating clean lines while focusing on shapes. Straight, visually appealing, horizontal lines on the wall work best when paired with squared doorways. Similarly, furniture having straight, flat edges instead of curved ones can also work wonders. If you are into having a bit of contrast, you can place a round table in the center of the room. The ultimate goal is to set up a room that gives a sense of calm and makes you feel relaxed.
If you're planning on replacing your old furniture with something new, look for items that serve multiple purposes. Some items, such as various shelves, have extra storage space, and buying such items should be a priority, especially for small homes or studio apartments. You can also repurpose the pieces in your house to make new furniture items that can be used for various purposes. For instance, you can make yourself a console table and a seating place by placing a wooden tray on a bench.
These useful tips will make your home look beautiful and modern as ever, without adding too much clutter to it. Remember- sometimes the simplest decor can transform your home for the better.
Wooden decks in the backyard patio look incredibly aesthetic; we can’t deny that. But, that ravishing look needs to be maintained if you want your wooden decks to remain functional for years to come. We have a step-by-step guide to cleaning your wooden decks to ensure they look good as new.
Many people are unaware of cleaning and maintaining their wooden decks or they haven't been doing it the right way. Here's a step-by-step guide on how to clean wooden decks, along with some helpful tips:
Greens do more than just add a colorful element to your outdoor wooden decks. Although, you’ll have to put your eco-friendly friends aside for this chore. If there are any plants, shrubs, or flower pots on your deck, you have to keep them somewhere else temporarily while you're cleaning the deck. The high pressure of water or the cleaner can prove harmful for them. The same goes for any chairs, grills, or toys that you keep on your deck.
A helpful tip: If you can't stash them somewhere else easily, another alternative is to water them and cover them with a piece of plastic tarp. Similarly, if there's no place to store the chairs, grills, or toys while you clean the deck, you can work in two parts. Move the things to one side while you clean the other.
Clear all the debris and dirt by sweeping the deck. Dead leaves, broken twigs, and dirt make their way to the surface and accumulate there. We’re guessing this spot might also be in the list of spots you don’t clean. So, don’t miss out on the spaces between the boards. Otherwise, there's a chance that the leaves will decompose, causing the entire dock to rot eventually. If it's a second-story deck, clean the underside and the stairs by going beneath.
Some tips: Use a putty knife and clear all the nooks and crannies. If you're having trouble sweeping the debris, you can even wash it away using a pressure washer, but make sure the water spray isn't too hard to damage the wood.
Choose any cleaner that works well for you. We suggest CleanPacs all-purpose cleaner to get rid of any stains, dirt, and dust without damaging the surface. Dip a paint roller or a brush with stiff bristles in the cleaner, and apply it on the deck's surface generously and vigorously. Once the entire deck has been treated to a cleaner, let it sit for a while.
Some tips: Before you apply the cleaner, pour a few drops onto a test area to ensure no discoloration or damage occurs. A nylon bristle brush is an ideal choice. Try to schedule the cleaning on a cloudy day, as the boards will be cool, and there won't be any sun to evaporate the cleaner.
Now that you've got the cleaner all across the deck and have let it sit for a while, it's time to rinse. If you have a pressure washer, that'll save you a lot of time and energy. Otherwise, you can also work with a garden hose.
After it has dried, seal your deck using a sealer, or apply a stain. Sealers help protect your deck from harmful UV radiations and act as a water-resistant layer, which increases the life of your deck and prevents water damage and mildew or mold infestation. Use a brush or a foam roller to coat the entire surface as well as the railings and benches. Let the sealer dry before moving your things back onto your now gleaming wood deck.
Some tips: Before using the sealer, apply some sand to eliminate the small pieces of dirt and loose debris caused by washing. If you're confused, two thin coats of sealer or stain are more effective than a single thick coat.
Now that you know how to make wooden decks squeaky clean, it’s time to step out and get down to it. Experts actually recommend cleaning wooden decks properly twice a year. So, add it to your list of bi-annual chores!
Imagine the scenario where your kid is running late for school or your family has a dinner party to rush to immediately and you can’t find your kid’s clothes in their messy closet. It would be a dream to know exactly where each clothing item is and easily find it in those times. It doesn’t have to be impossible. Start with the following tips:
Schedule organizing your kids' closet when you know they won't be home so that you can arrange their closet peacefully without any interference. On the other hand, if your kid is of the age that they can help you out, have them participate in this chore. Then, start with a clean slate. You can't organize a closet, especially for the first time, when it's full. Take everything out for a full closet cleanout. This way,you know what you'll be working with. You'll also know what doesn't belong in your kid's closet and it can be better stored somewhere else. Then, analyze the space available, and plan on where to put all the items. If you try to arrange your kid's cupboard when everything is chaotic and disorganized, it'll take you more time and effort to sort everything out. So, for starters, dump everything outside the closet and then systematically organize it.
You don't want your kid calling you every time they want to change their clothes just because they couldn't reach them. So, when organizing your kid's closet, get down to your kid's level physically and think from their angle. Arrange the clothes in a lower rack so that they can get to them even with their short legs. Many parents don't think of this, which is why their kid's closet has hooks hung at the height of 80 inches while the kids are only 4 feet tall, making it extremely difficult for them, and the children to maintain an organized closet even half the time.
According to experts, it is nearly impossible to properly organize a kid's closet and keep it maintained without using bins and baskets extensively. They are mainly used as storage containers for toys, where you can group all the dolls and keep them in one basket and all the model cars in a different bin. There are basket liners so that the small toys or lego pieces don't get lost. Once your kids know which toys are stored in which baskets, they won't have much of a problem finding them and putting them back once they're done playing with them. If you have less space for hanging clothes, you can even use bins and baskets as a built-in laundry container. If you haven't used pull-out baskets yet, you'll instantly become a fan once you buy them and recommend them to others as well.
You can look anywhere and everywhere, but you won't find a hack, tip, or tool that'll help you store and arrange years-old clothes, shoes, and toys. The only possible solution left is to purge the closets regularly. Get rid of old shoes. Throw away worn-out clothes. Donate the toys that are no longer your kid's favorite to any charity or a deserving person that you know of. The time after which a closet needs purging varies from person to person, but some experts suggest a purge every three months, while others recommend doing this twice a year. You can even involve your kids by keeping a basket that'll store any item that requires letting go. If they don't use that item for a week, it'll be up for donation or thrown away. Your kids might find it extremely difficult doing it the first time, but they'll get used to it gradually.
Amongst the millions of chores that adds to a parent’s daily tasks, you can take the trouble of foraging through your kid’s closet every time out of the list. It’s a bonus element to getting your kid’s room tidier and organized too.
]]>
Unlike humans, pets can't clean up their mess, which means that you'll have to do it for them. Keeping your home clean is a tough job on its own, but it becomes even harder when you have one or more fuzzy friends roaming around. Don't worry, though - cleaning up after them is definitely worth it. But, how do you do it? Well, here are some tips that'll get you on track.
Many people have searched endlessly for the "miracle" cleaning product for removing the toughest of stains while it has been sitting on the counter of their washrooms. With shaving cream in your cleaning kit, you can get rid of dog pee, cat vomit, and whatnot, as long as you're using foam rather than gel. Spray the shaving cream on the stain, let it sit for a couple of minutes, and then wash it off with warm water. It's a tried method as many experts have used it for cleaning all sorts of smudges from their furniture. If this doesn’t work for you or you’re a bit skeptical, use an all-purpose cleaner; that'll do the trick too.
Even if your pet doesn't shed that much hair, you still need to vacuum the house regularly. Many pets, especially dogs and cats, love to roll in the garden whenever outside, and when they come back in, they bring dirt and debris along with them. So, if that's the case with your pet, you'll need to get rid of these in addition to hair. And for that, you need to invest in a good quality vacuum cleaner. A robot vacuum can do the job itself while you're busy at work or are sleeping at night. A vacuum having a powerful suction and a good filter can make your job easier for you, as it will empty without much hassle and won't get clogged. So, having a good vacuum cleaner and regularly using it can go a long way in keeping your home clean with pets.
Another way of keeping your home clean with pets is to groom them after 2-3 days or weekly. Clean their nose and eyes properly, and give them a nice warm bath to reduce hair fall. This trick also makes sure that your pet isn't shedding as much dandruff. Moreover, if it is done in a routine, your pet won't consider it a punishment and they’ll begin to cooperate. So, the best way to clean your home is to clean your pet.
Your pet might have different toys to play with. But, these toys can be what's keeping your home from being clean. If you're not organizing your pet's toys, it can add to the clutter in your home, and that's the last thing you want and need. Designate a basket or a cupboard where you stash all your pet's toys. So, whenever your dog is done playing with its favorite toy bone, or once your cat has had its fill of the catnip toy, make sure you put it back in the basket or cupboard. Similarly, if a toy has become too battered, or if your pet doesn't play with a specific toy anymore, swap them with a new toy that your pet likes. Clean the old ones and donate them to any nearby animal shelter instead of throwing them away.
Even if you manage to keep your home clean with pets, it is advisable to hire a professional every now and then. Tell the professionals about your pet's sensitivities so that they don't use anything that'll affect your pet's physical health. Once they're done making your house sparkling clean, you'll realize the extra few bucks spent were worth the relief and satisfaction.
These tips will allow you to take care of your pets while also keeping your home clean. You don't have to restrict them from running in the house or keep them locked outside to avoid a dirty home as long as you practice these techniques regularly.
]]>
You can get your home or office area spick and span from top to bottom, but most struggle with the paper clutter. We agree that the clutter never ends! Even when you've cleared it all out a few weeks back, there's bound to be piles and piles of useless paper in several weeks. Here are some tips that may help you in reducing paper clutter and keeping your work area organized:
If you let a piece of waste paper sit on your desk, it'll start to attract more clutter. Instead of throwing the new junk, it'll be added to the pile sitting on your desk waiting to be thrown out. So, one of the most important tips to reduce paper clutter is to deal with it instantly without delaying it. While on the way back from your mailbox, check for any junk mail and throw it in the trash can right away. It won't add to the paper clutter in your home if it doesn't make it past the main door.
In this era of modern technology, you can even go paperless. Any document that makes it to your work table can be scanned and kept in your computer's "office work" folder. Similarly, keep a soft copy of your bills saved on your computer, and you can access it anytime. You can even take it to the next level by paying your bills online as well. If you think your kid's drawing is taking up too much important space, make a digital photo book in which you can keep it with the rest of your family's keepsakes. Once you've made a soft copy, there won't be any use of the hard copy, and you can throw it away, reducing the paper clutter in your home. Also, you can use this tip to make your work-from-home area, one of the biggest paper clutter culprits, more eco-friendly.
Many people resent the idea of dealing with the paper clutter because they don't want to dispose of sensitive information, such as bank deposits or credit card receipts. So, if you're worried about privacy too, you can use a shredder to make any private documents safe for disposal instead of tossing them along with the rest of your trash. If you can't buy a shredder, many offices allow you to shred your documents for a fee. Some credit unions and banks have selective days on which you can use their shredded for free. You can go for this option if you don't have many things to shred, and buying a shredder isn't feasible.
Coupons are great, but they can also be a great source of paper clutter. Many end up at the top of the heap of trash. Important receipts can be a nuisance if not properly organized. Using a binder can solve both problems. Index card cases can also do the trick. But, make sure you keep the binder somewhere accessible, where you don't forget it while going out, or make an excuse for not adding the receipts to it regularly.
No matter how hard you try to keep the paper clutter level down, there will still be a few receipts here and some junk mail there. To truly purge your home from paper clutter, you'll have to schedule regular paper clutter sweeps. Depending upon the amount of paper clutter that accumulates and according to your feasibility, you can go for weekly or monthly sweeps. But, now and then, take out a few minutes and walk through your house to gather any paper lying on a surface that needs to be in the trash. Actually, why not add this as a 5-minute task to your daily chores?
With timely cleaning and organizing, you can significantly minimize your paper clutter, if not eliminate it. Follow these tips, and you'll immediately notice a difference! Not only will the clutter reduce, but everything will be much more organized.